Connect EasyClaw via WeCom (Enterprise WeChat)
With the WeCom channel, you can send commands to EasyClaw directly from WeCom — enabling remote automation control anytime, anywhere. Both QR scan and manual binding are supported.
• EasyClaw is installed and running on your computer
• WeCom client updated to the latest version
• A WeCom account with permission to create AI bots
If you can't search for "AI Bot" in the Workbench, check your WeCom version and upgrade to the latest, then try again.
Bot Creation Entry Point (by Role)
| Account Role | Path |
|---|---|
| Admin | WeCom Admin Console → Security & Management → Management Tools → AI Bot → Create Bot → API Mode |
| Regular Member | WeCom Client → Workbench → AI Bot App → Create Bot → Manual Create → API Mode |
Register a free enterprise account at work.weixin.qq.com.
Method 1: QR Scan Quick Setup Recommended
Best for users who want one-click setup — the system automatically retrieves Bot ID and Secret and completes binding after scanning.
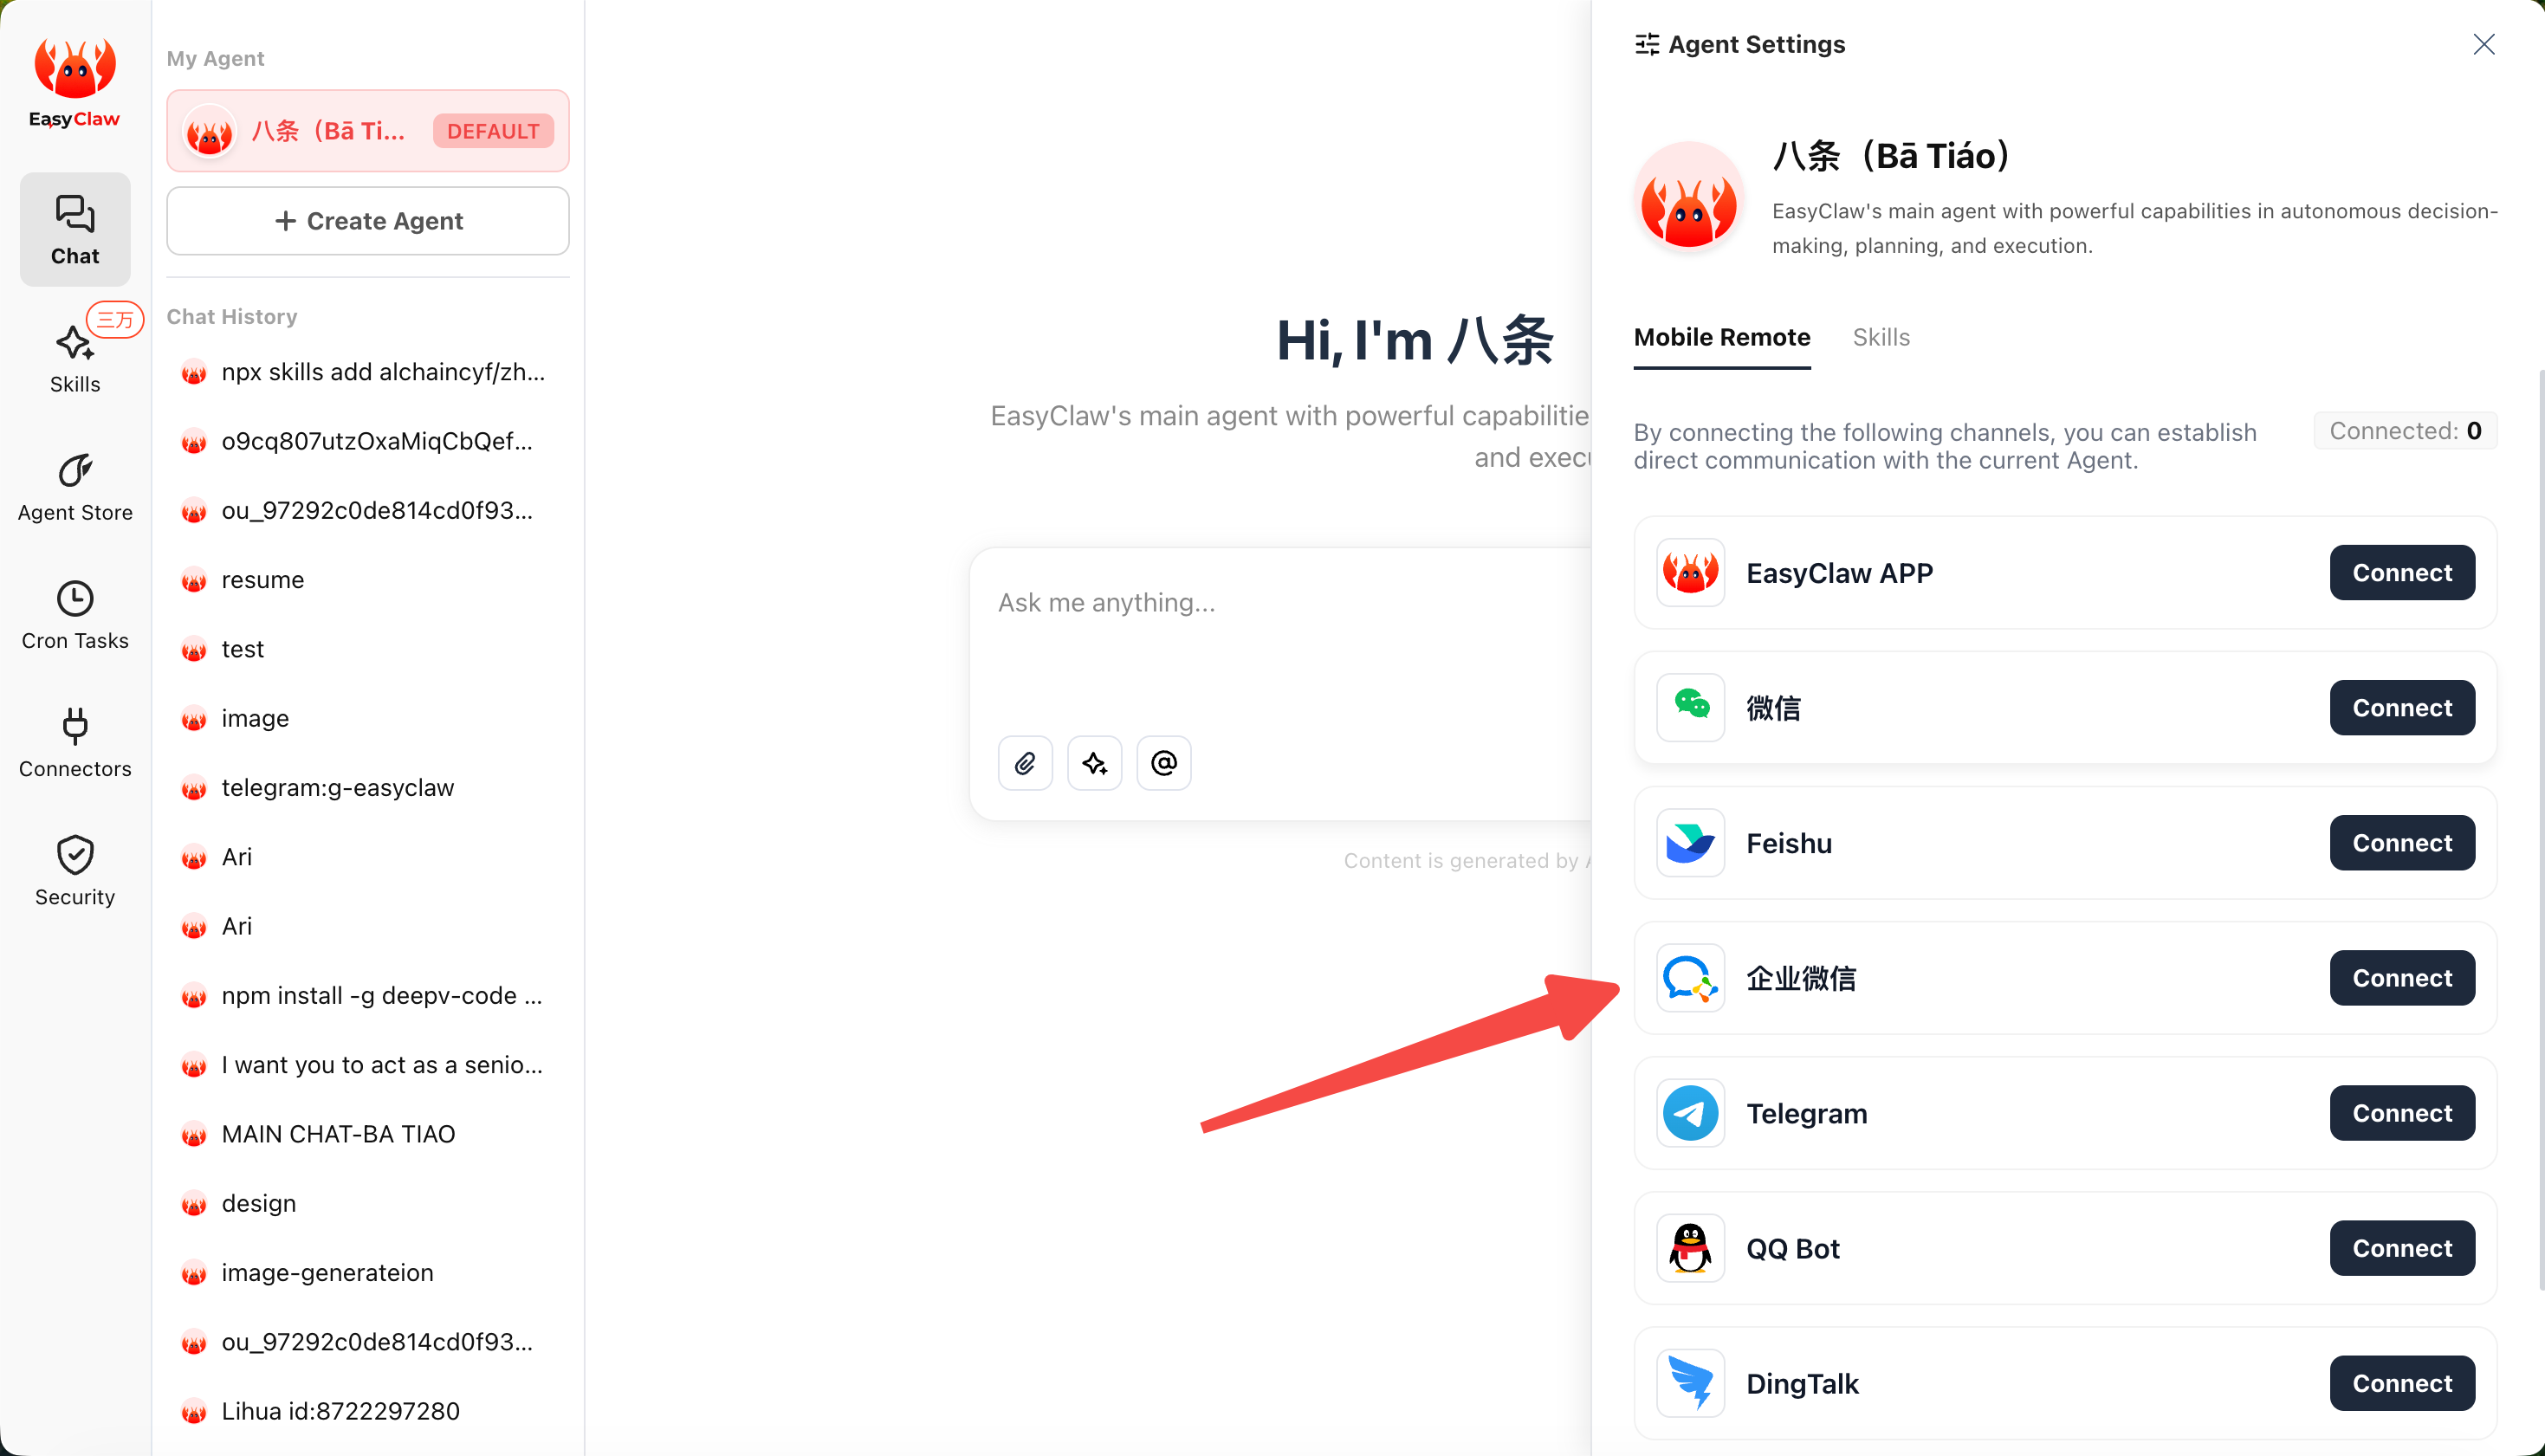
Open Channel Config
In EasyClaw desktop, click the settings button in the top-right → Mobile Remote → select WeCom → click Configure. A QR code will appear.
Scan with WeCom Mobile
Open WeCom on your phone and scan the QR code.
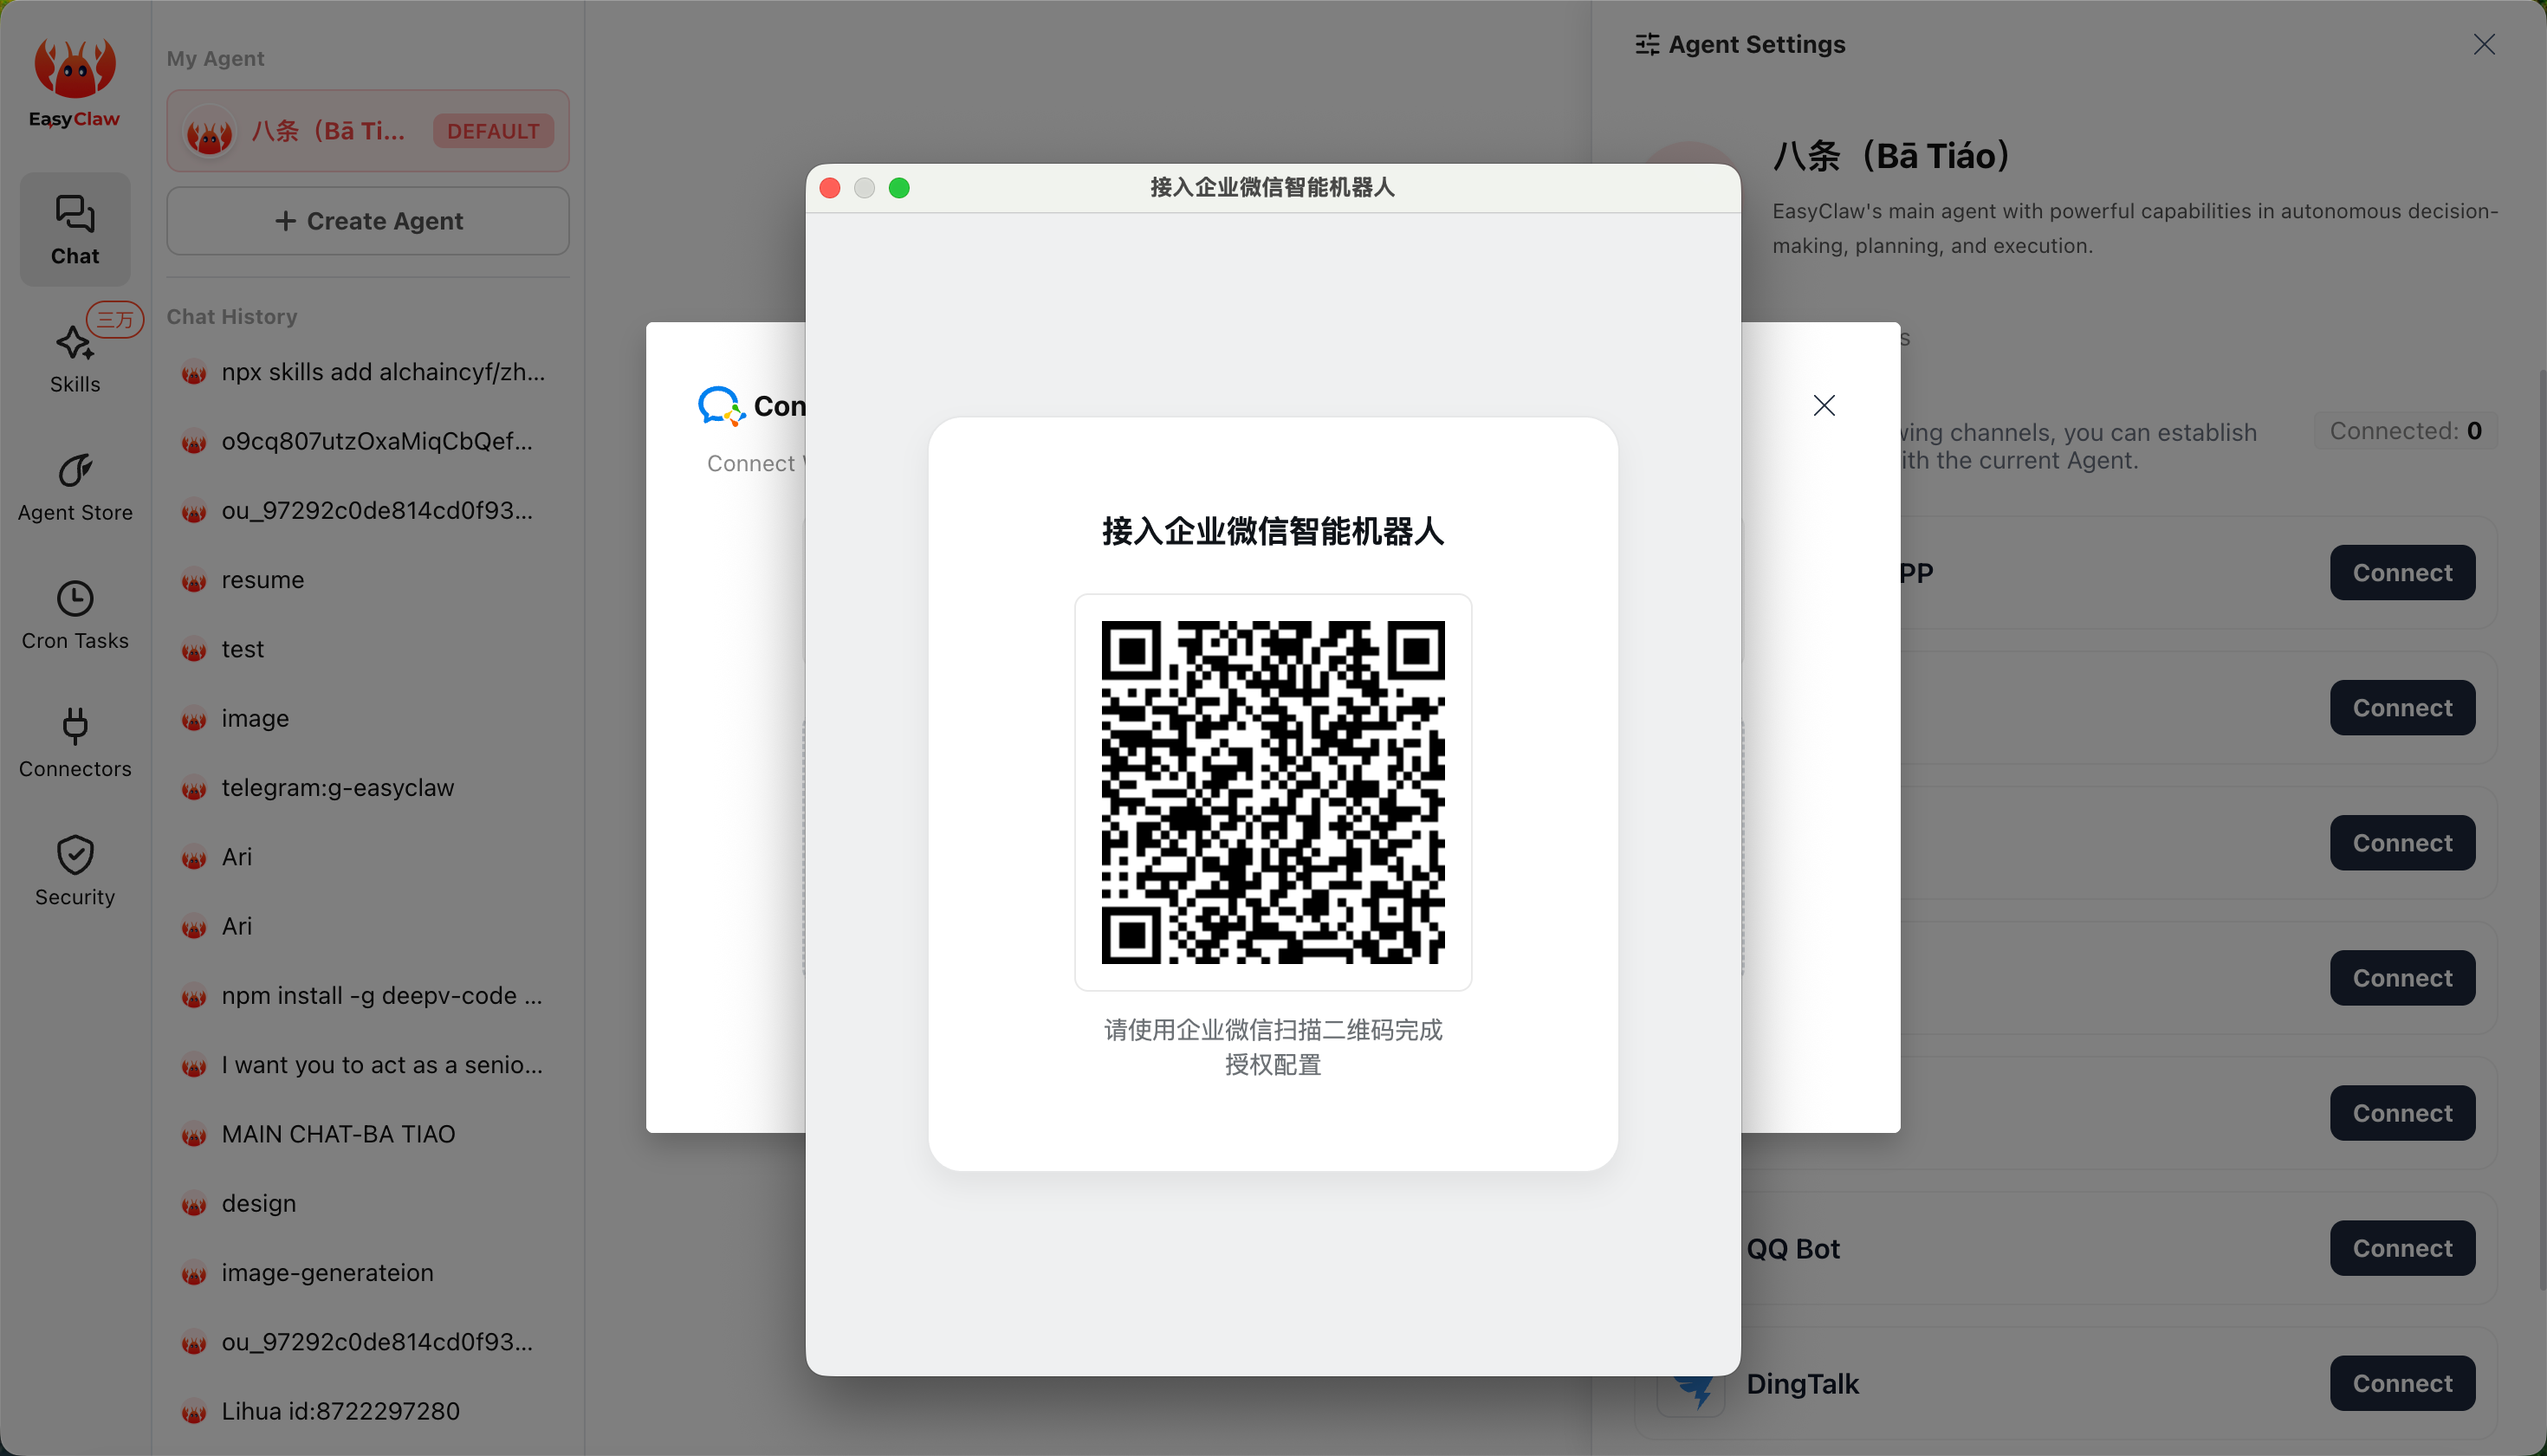
Binding Completes Automatically
The system will automatically retrieve the Bot ID and Secret and complete configuration — no manual input required.
Method 2: Manually Enter Bot ID and Secret
Best for users who already have a WeCom AI bot and want to bind it manually.
Step 1: Create an AI Bot and Get Bot ID & Secret
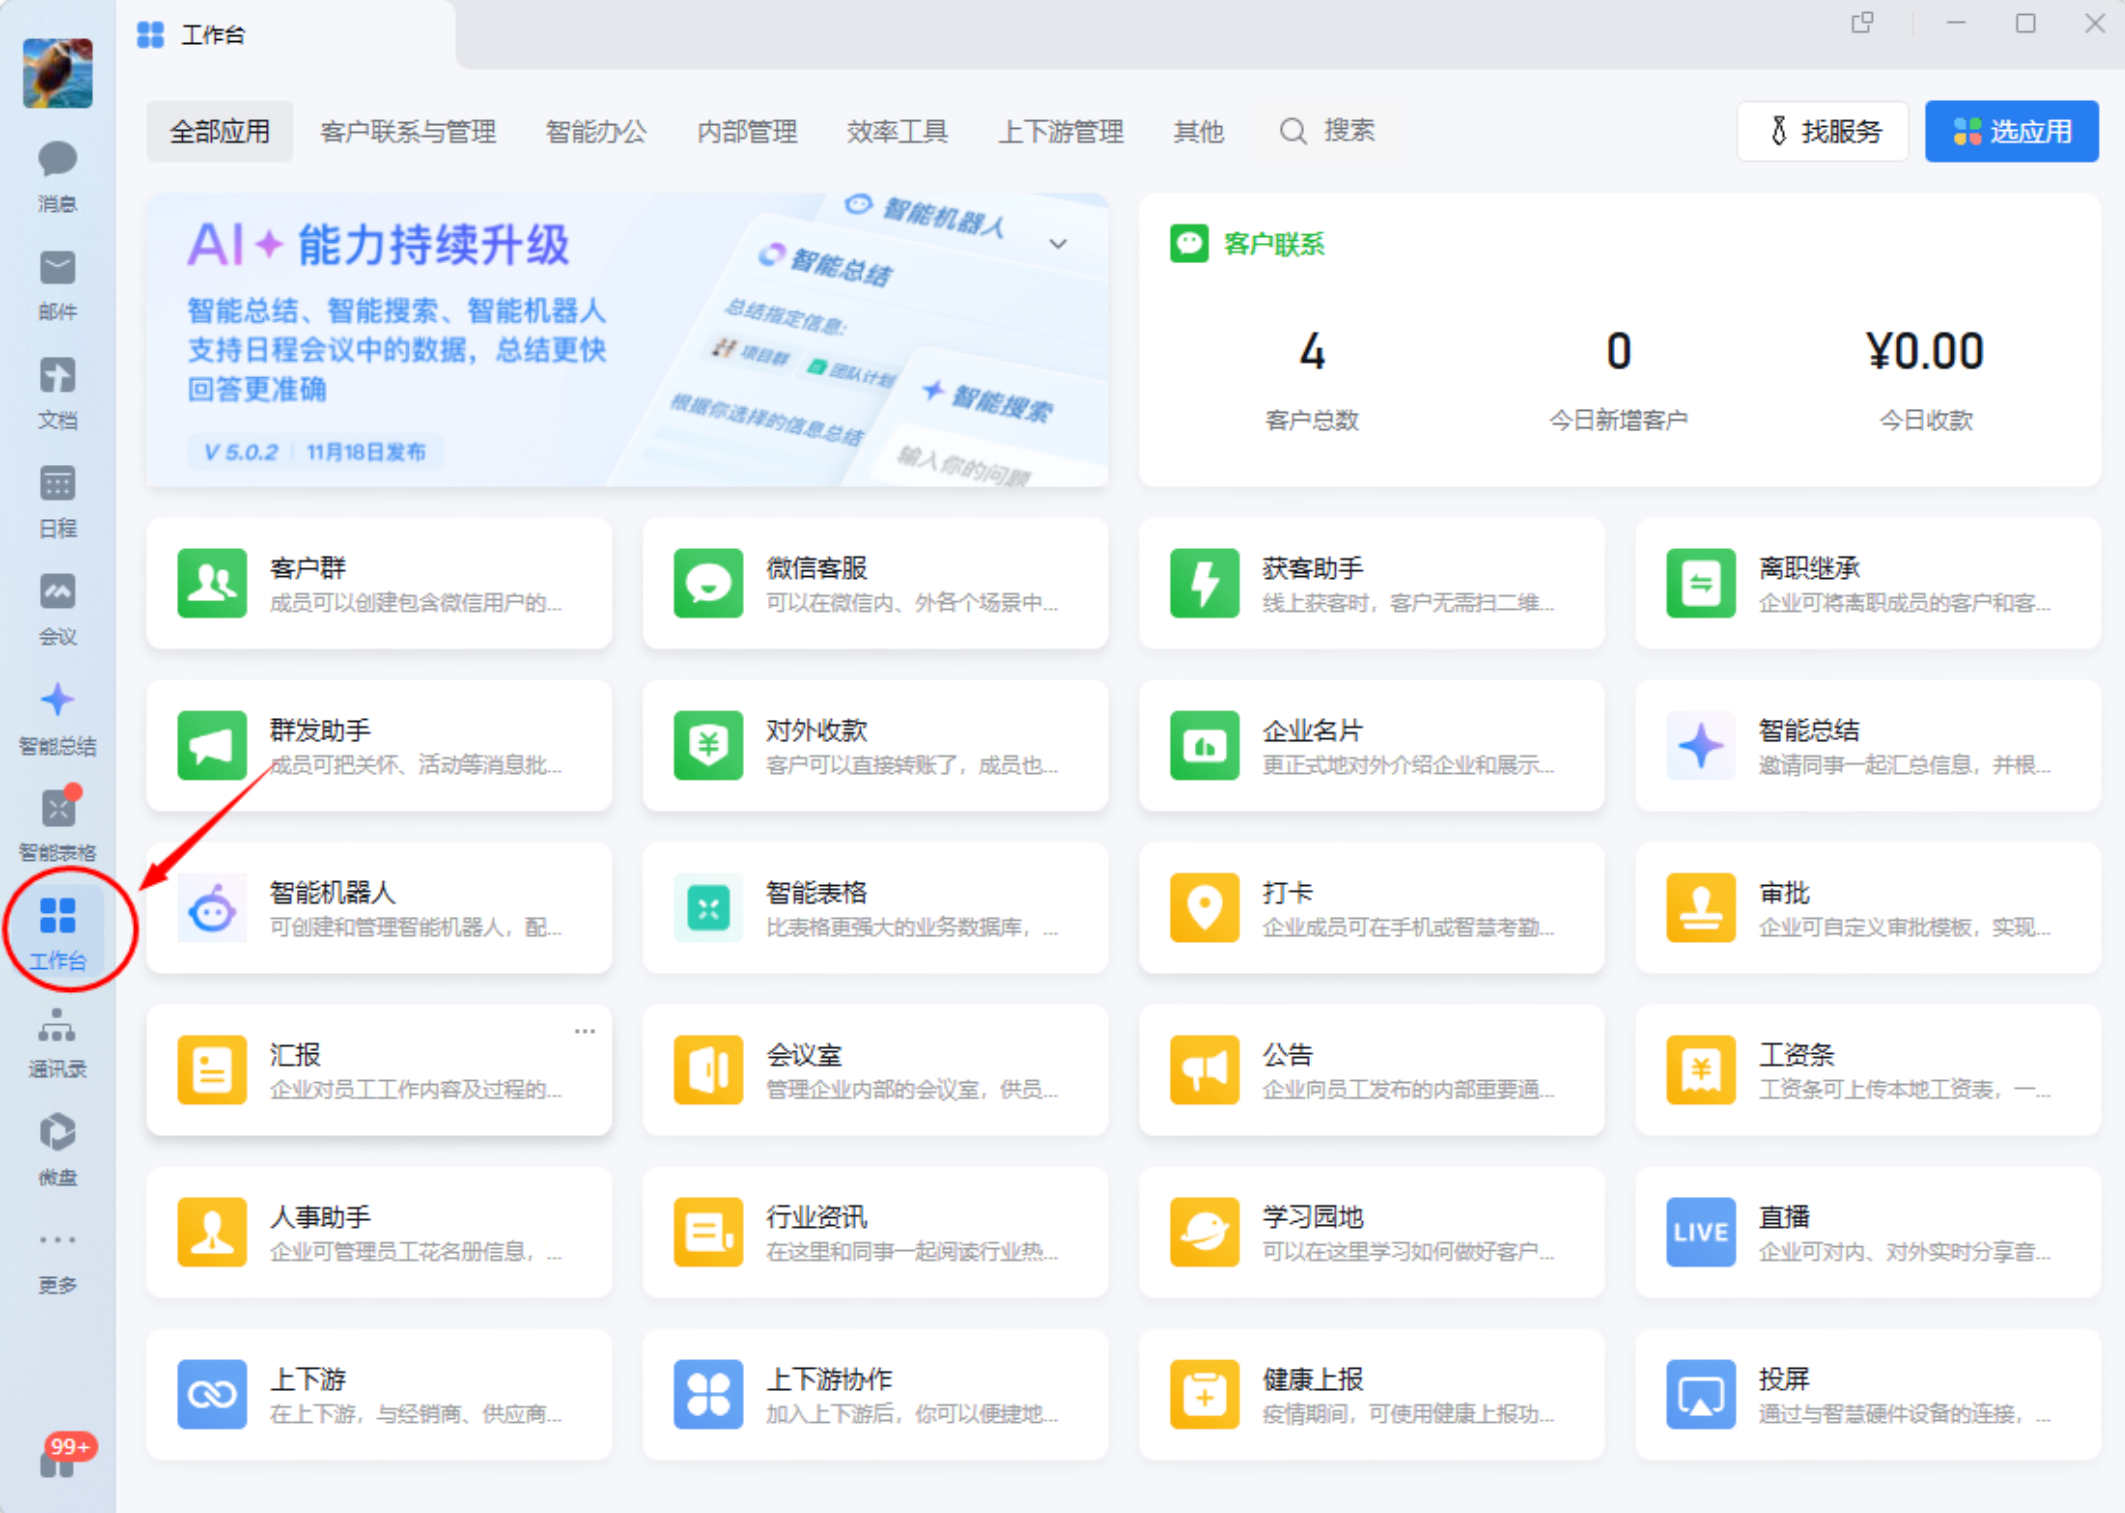
Open AI Bot
WeCom Client → Workbench → search AI Bot → click Create Bot.
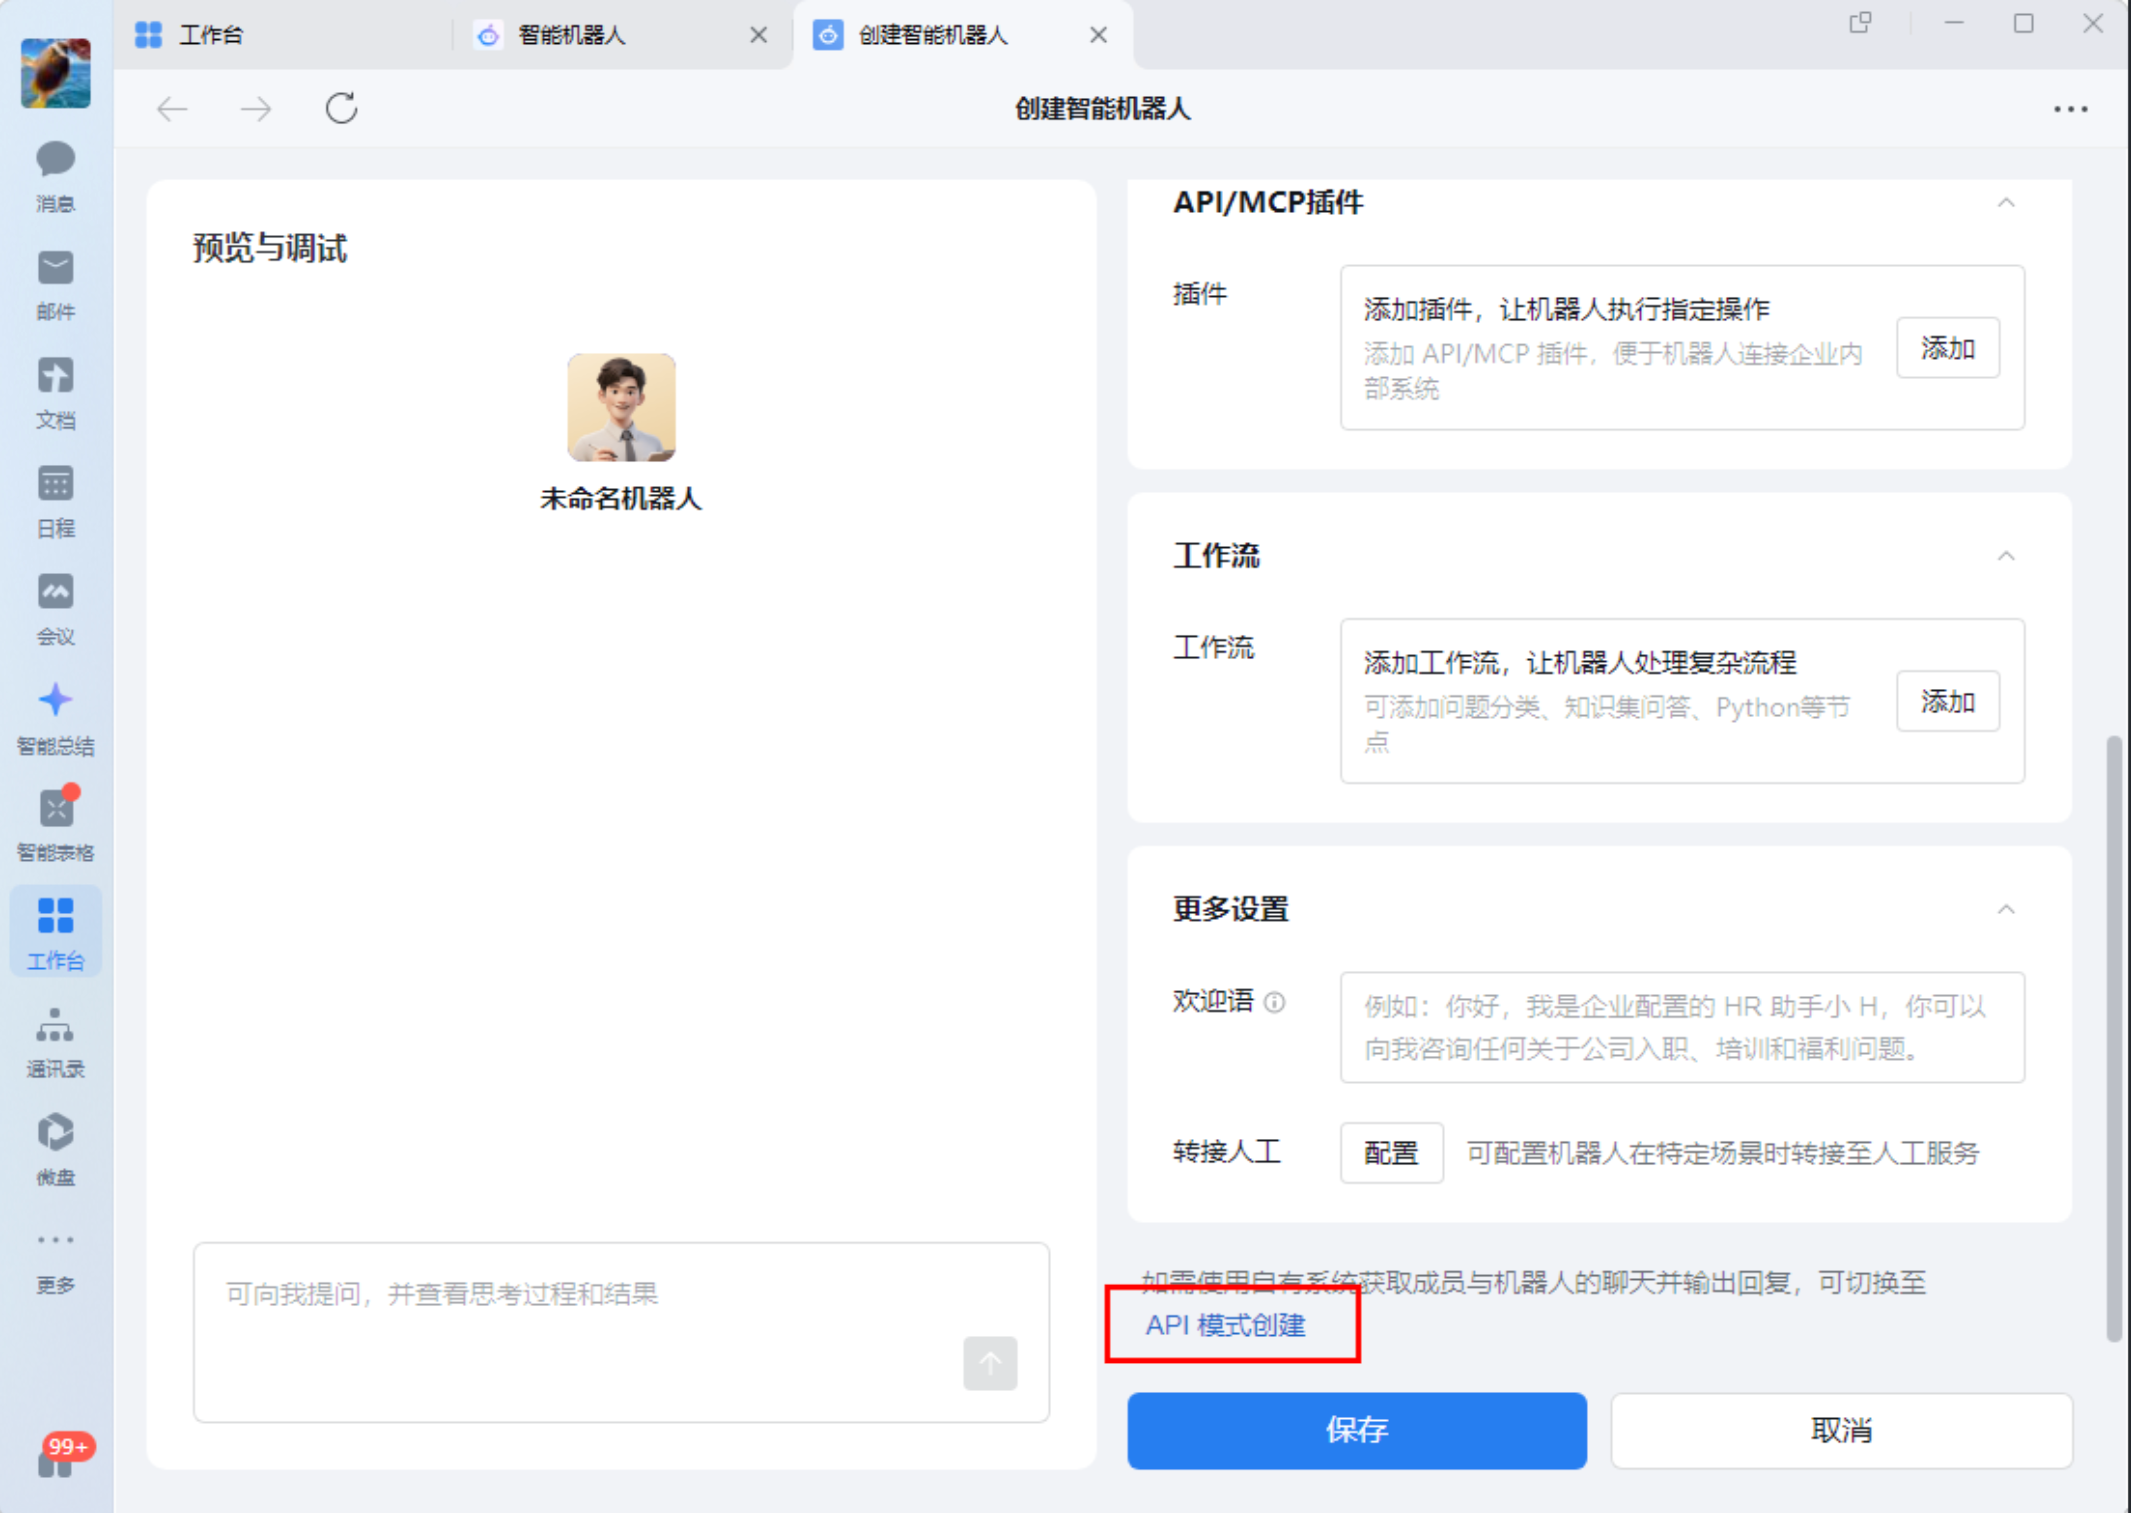
Select Manual Create → API Mode
Choose Manual Create, then select API Mode at the bottom of the creation page (hint: "Switch to API Mode if you need to use your own system to receive chats and send replies").

Fill in Basic Info
Enter the bot name — something recognizable like "EasyClaw Assistant." Click Edit next to "Authorized Members" to select the members, departments, or tags that can use the bot.
Configure Long Connection
On the API configuration page, set the connection mode to Long Connection.
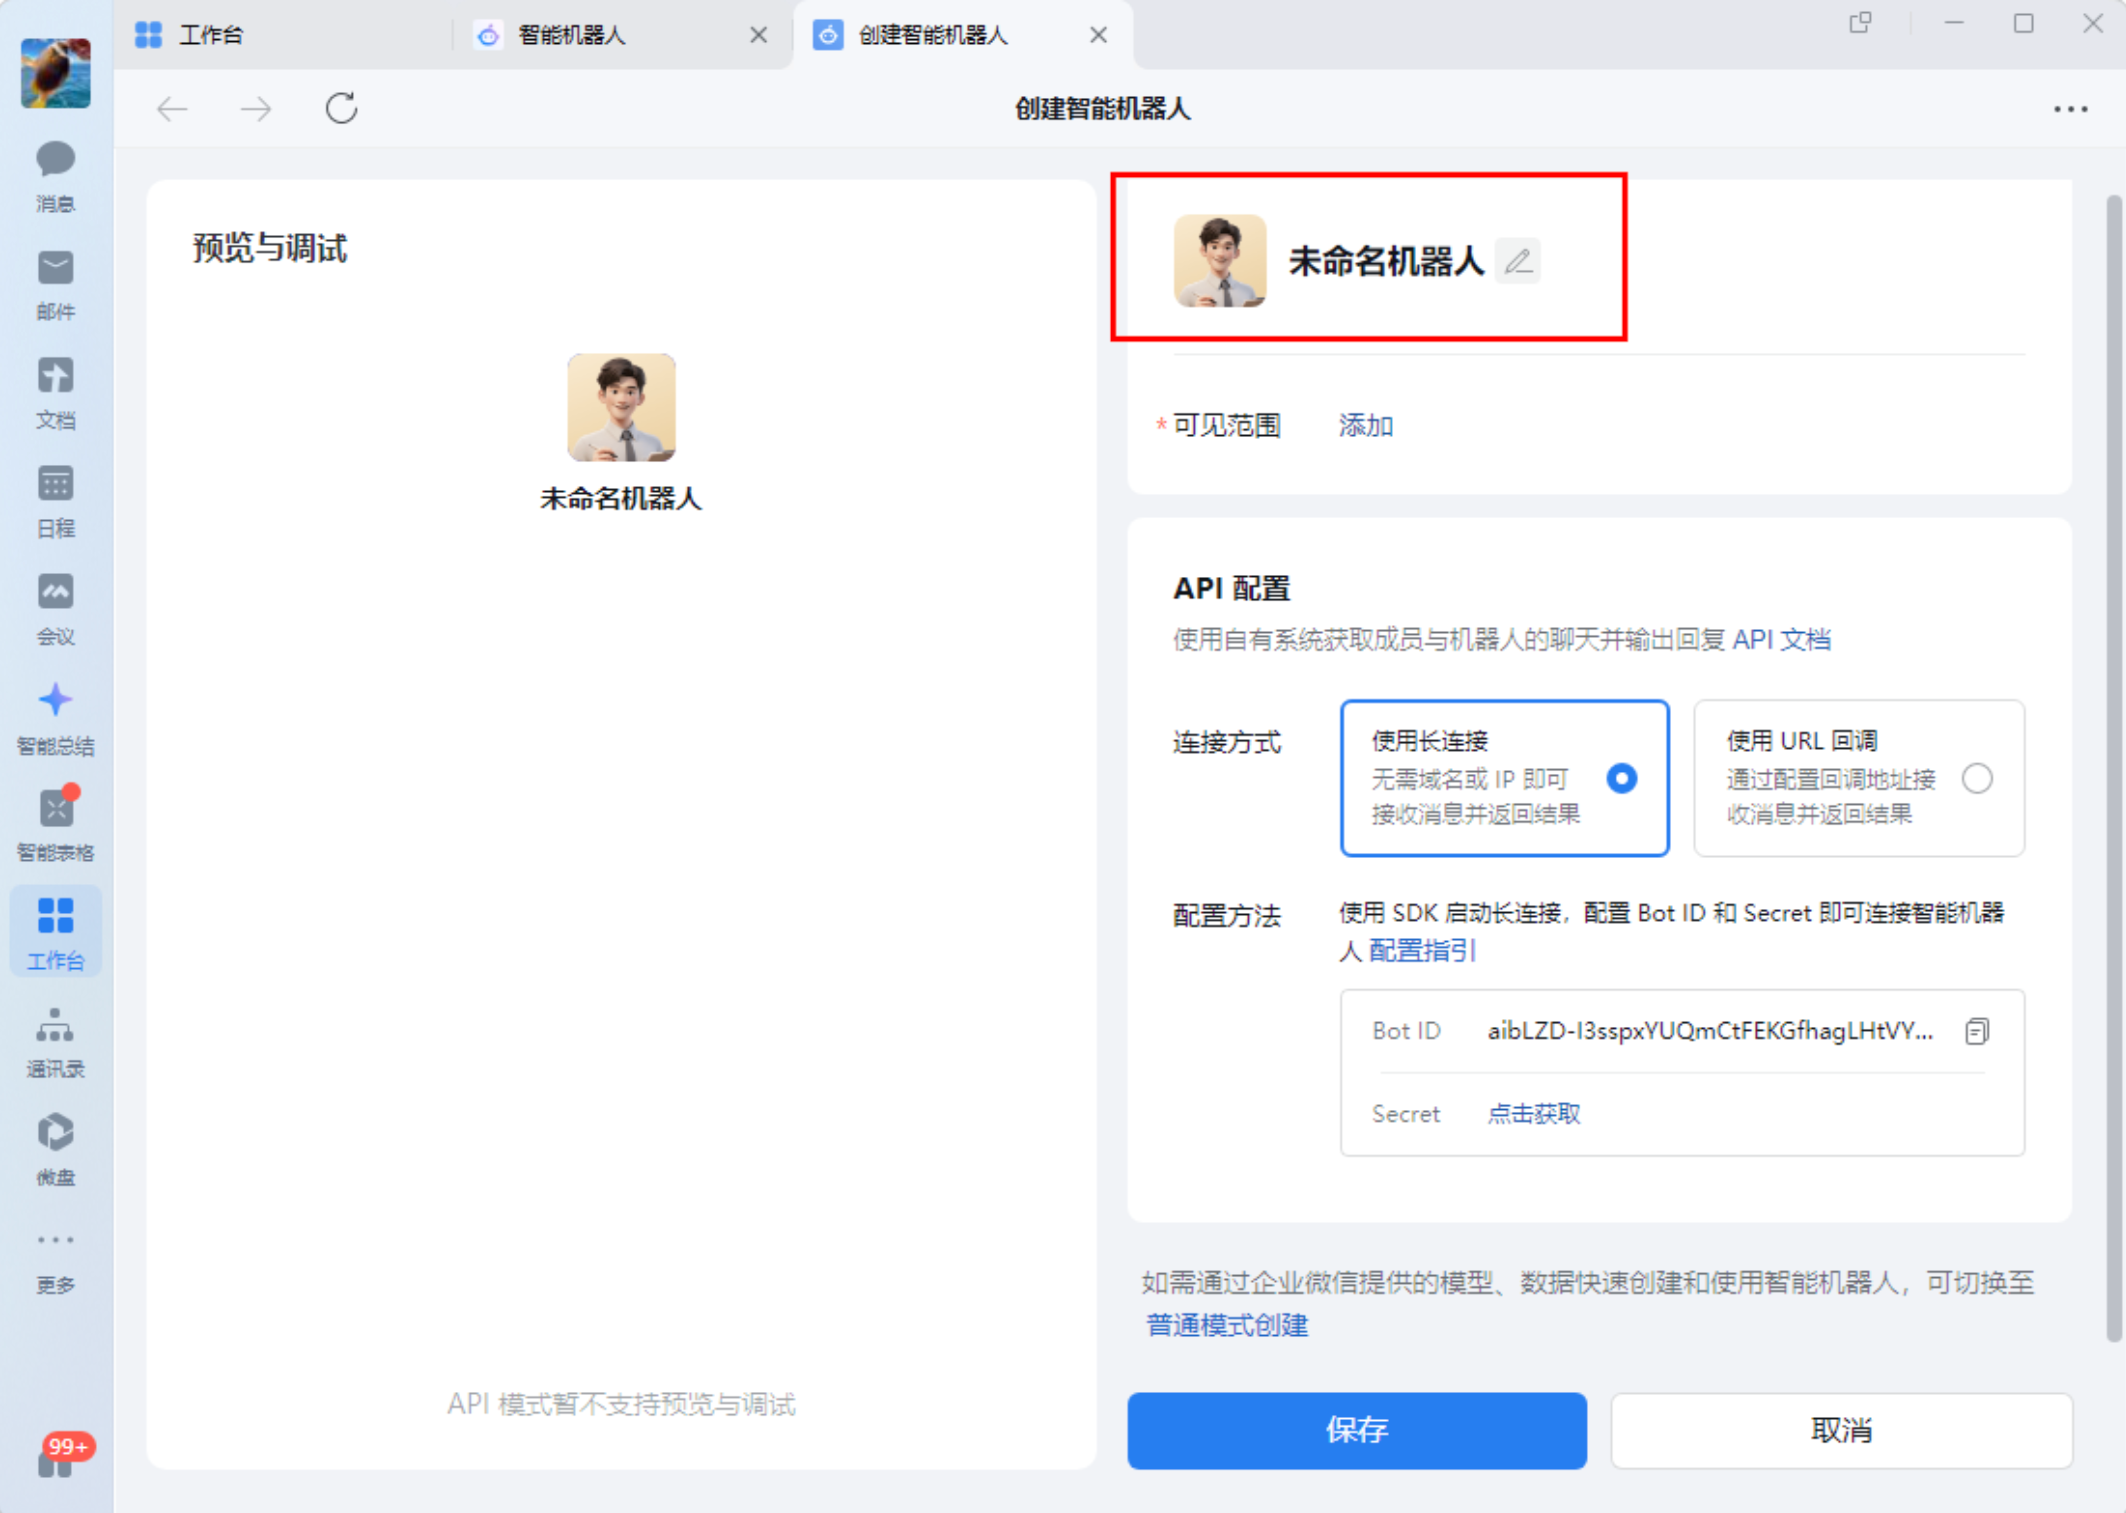
Get Bot ID and Secret
After configuration, the page will display the Bot ID. Click "Get Secret" to retrieve the key. Save both — you'll need them to bind EasyClaw.

Save Bot Config
API Mode does not support preview or debugging — just click Save to finish creating the bot.
Step 2: Complete Binding in EasyClaw
Open Remote Channel Config
Open EasyClaw → click the settings button in the top-right → Mobile Remote → select WeCom → click Configure.
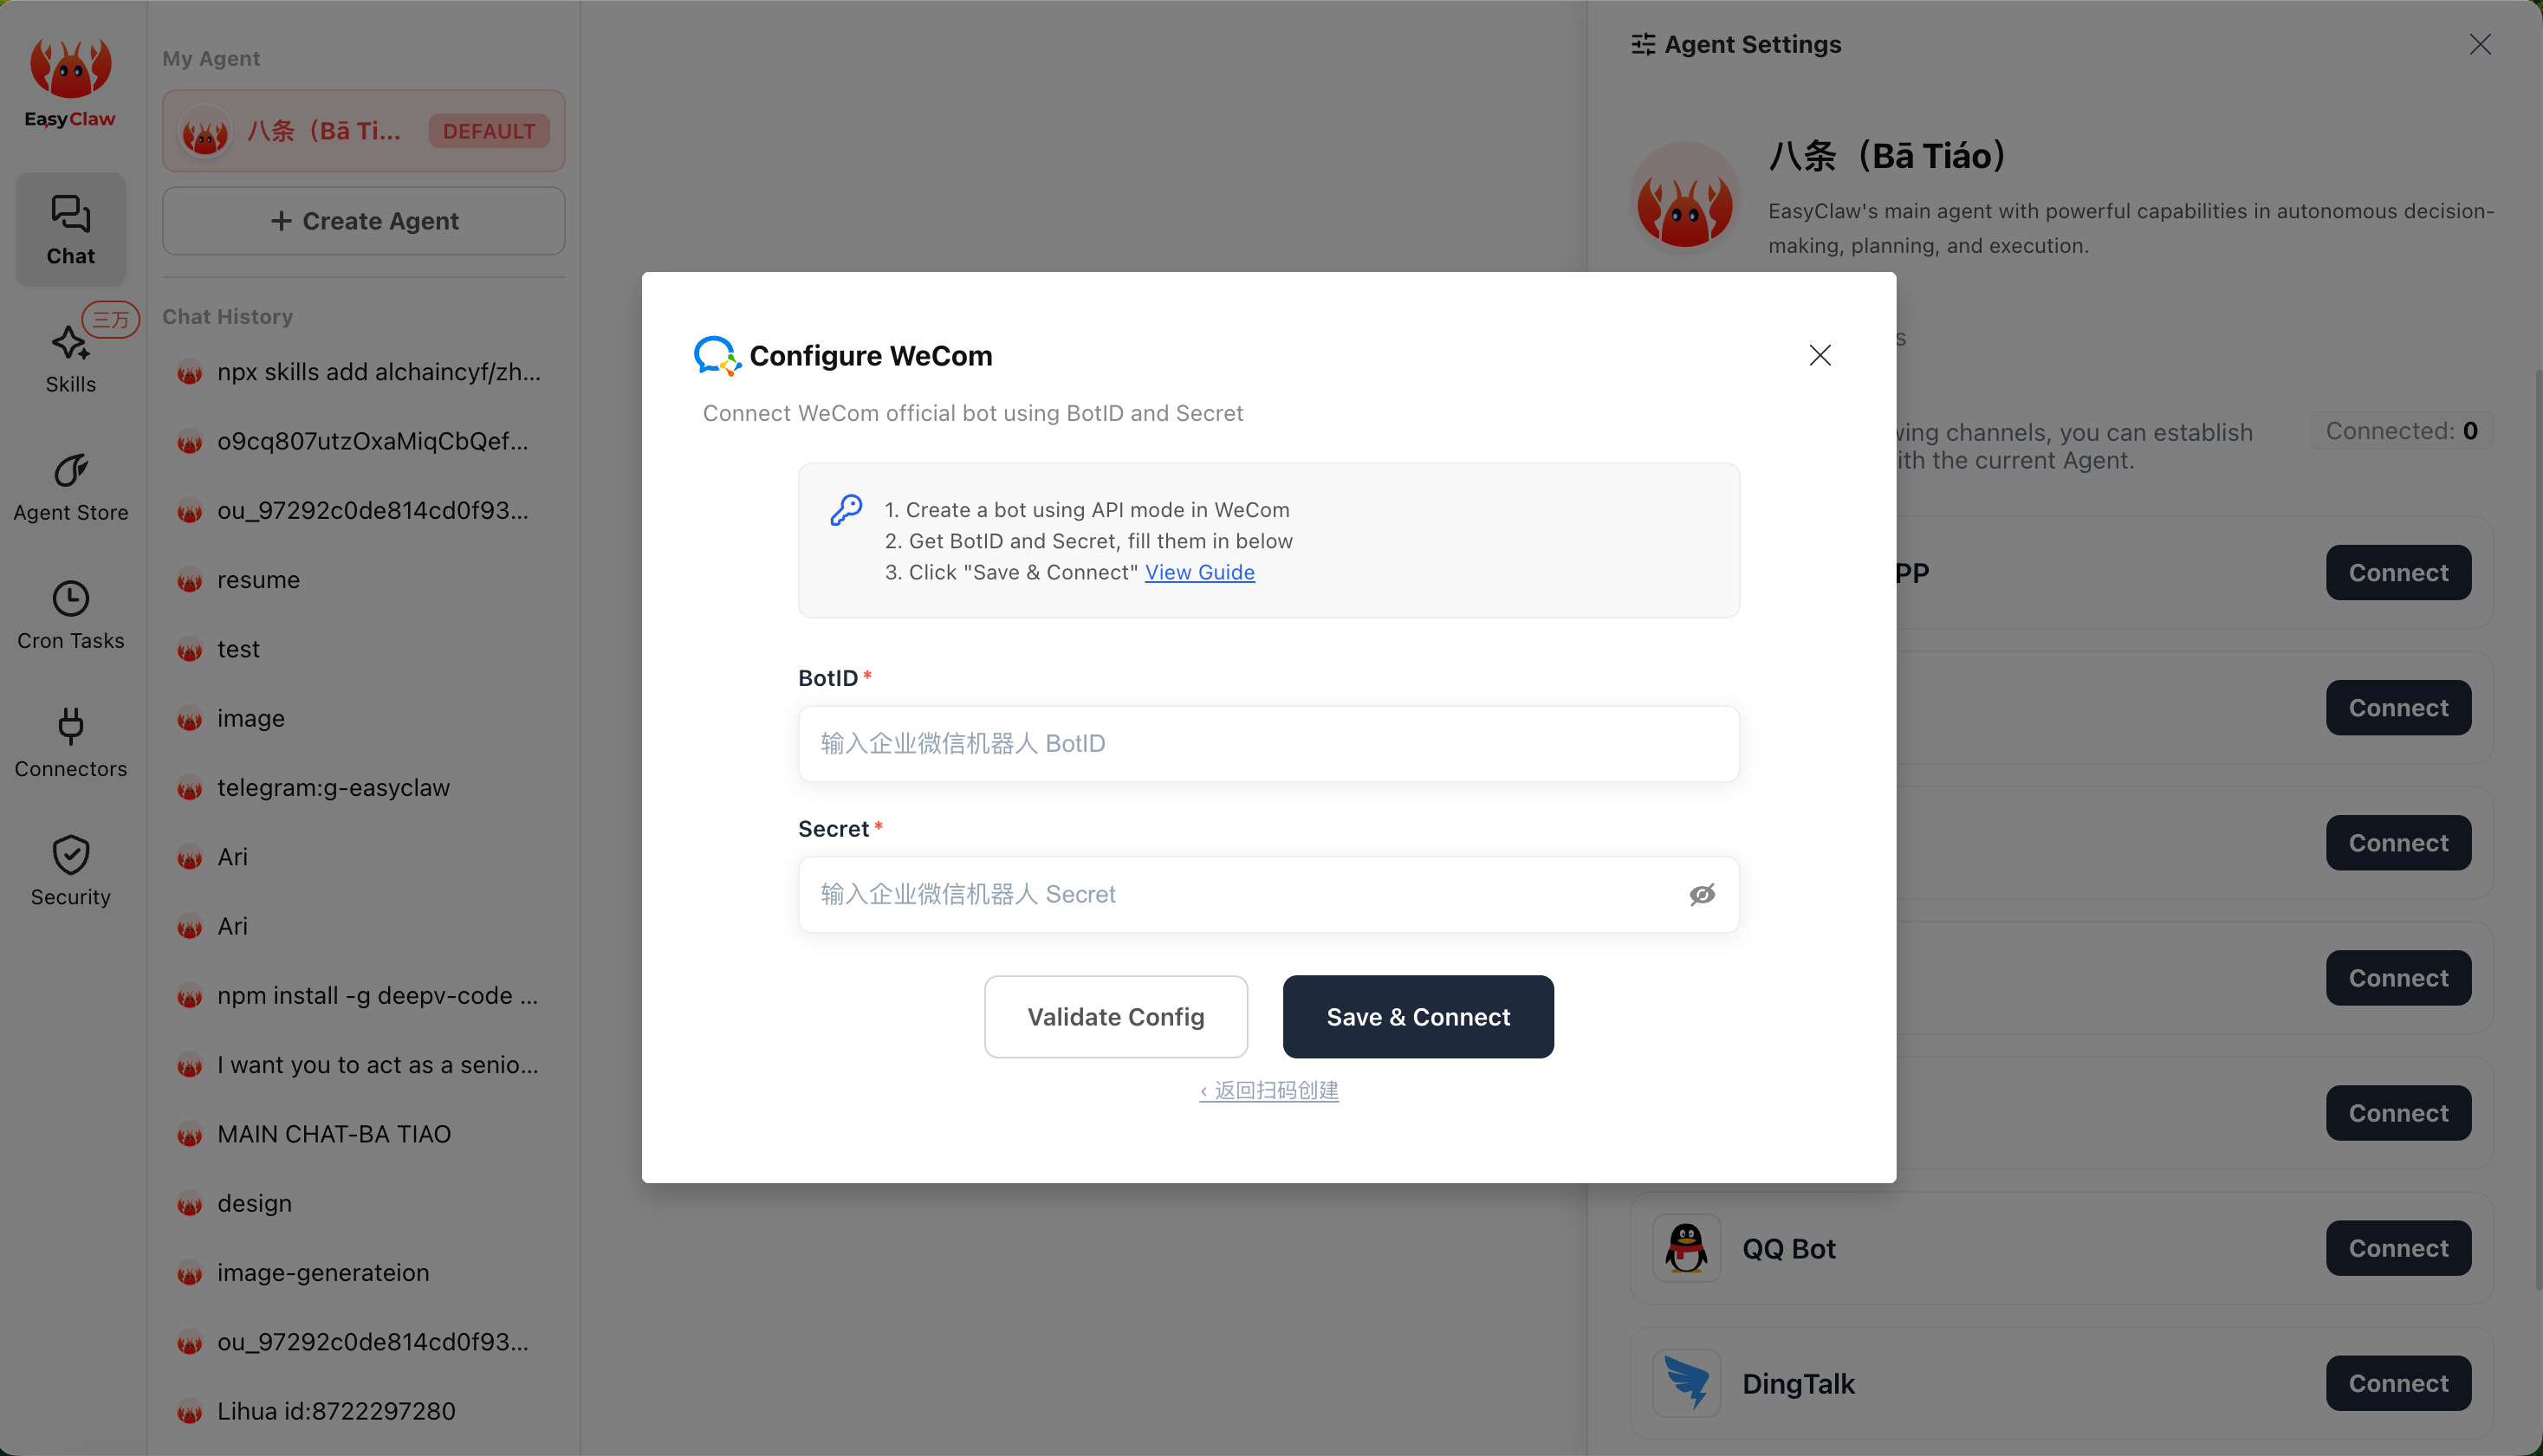
Enter Credentials and Connect
In the dialog, select Manually Enter Bot ID / Secret, paste the Bot ID and Secret, then click Connect. Allow a moment for the connection to establish.
Step 3: Start Using
Find the Bot
In WeCom contacts, under the AI Bot group, find the bot you just created and tap "Send Message."
Send a Test Message
Send a simple message (e.g., "Hello") to test the connection. If configured correctly, EasyClaw will receive it and send a reply in WeCom.
If the bot replies normally, you've successfully connected EasyClaw with WeCom. You can now send commands to EasyClaw via WeCom from anywhere to remotely control your computer.
The WeCom channel's conversation context is independent from the desktop app and other channels. To share important information or preferences across channels, ask the Agent to write it to MEMORY.md.